
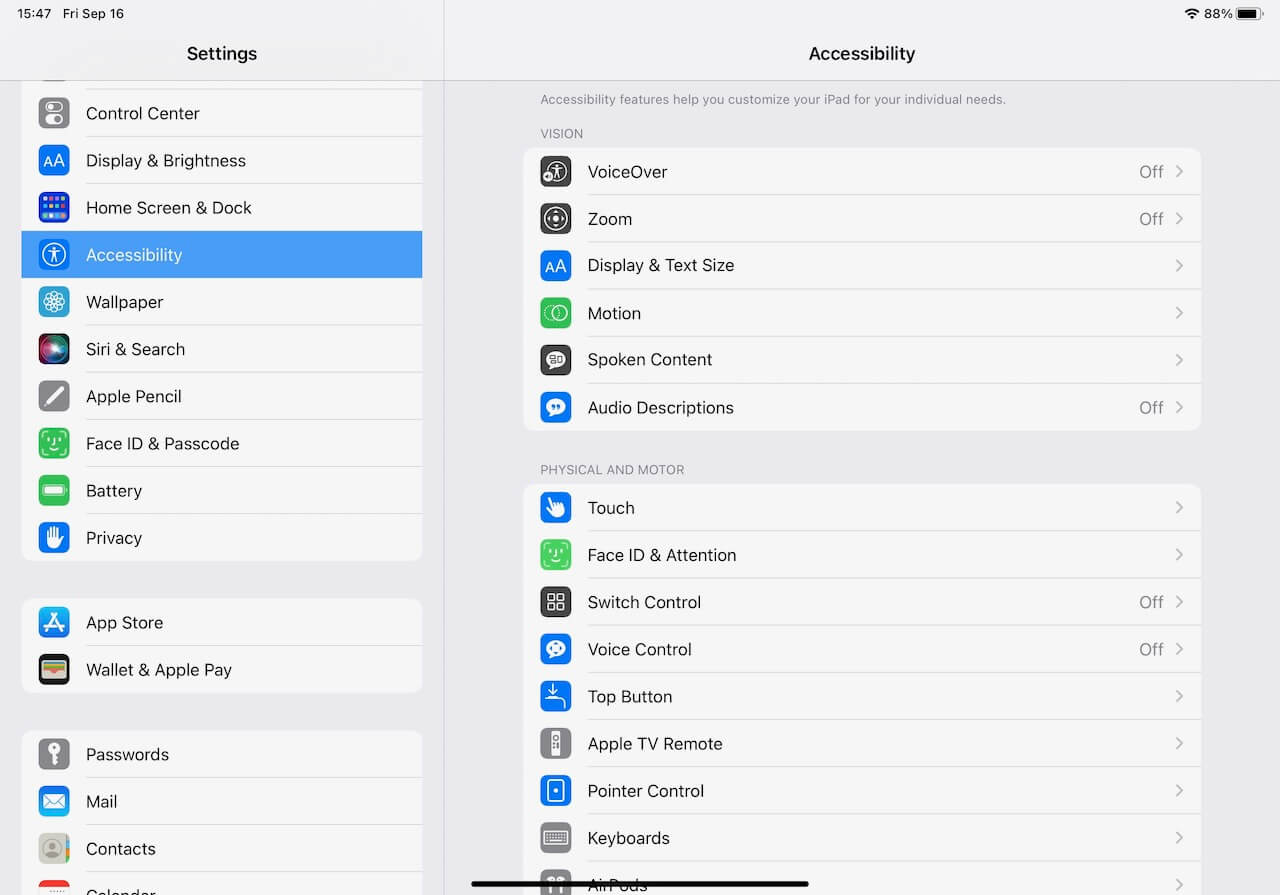
A new version of iOS was released this week, and while lots of people are excited about the new features, this is a reminder that some of the best iOS features are in “Settings -> Accessibility”.
Useful Accessibility Controls for Everyone
Accessibility controls are designed to help make a device easier to use for people with vision, motor, hearing, or other impairments.
However, on the iPhone, these controls unlock some cool features and offer customization and personalization that rivals Android phones. And it’s all baked into the OS!
Here are some that I find useful (or that I recommend to others).
- Vision Accessibility Options
- Touch Accessibility Options
- Hearing Accessibility Options
- Miscellaneous Accessibility Options
- AirPods Accessibility
- Apple Watch Accessibility (one-handed watch control!)
Vision
Magnifier
This one is easy to use on the iPhone or iPad right out of the box.
Triple-clicking the Home button (iPhone 8 or earlier and SE) or the side button (iPhone X and later) will bring up a *fancy* magnifying glass.
By default, the interface shows a slider to control zoom and a button for the flashlight. Tapping on the magnifying glass will switch the zoom slider to a flashlight slider.
Dragging the interface up slightly will reveal a camera button (photos are not saved in your photo library, though) and a gear icon for settings. Dragging up slightly further will reveal the secondary controls, which include camera selection (front or rear-facing), brightness, contrast, and filter options.
Zoom
While many users increase the overall text size on their device (Settings -> Accessibility -> Display & Text Size), you can enable a built-in “magnifying glass” that will zoom into a specific part of the screen. Settings -> Accessibility -> Zoom to enable.
A three-finger double-tap will create a window that zooms into a portion of the screen. This can enlarge a specific section of the screen (text *or* a photo) without changing the overall font size or screen layout. You can drag the zoomed-in window around the screen, adjust the zoom level, and even set a filter for the zoomed-in window.
Display & Text Size
This one is common, especially for older people or those wearing glasses. However, it has several lesser-used settings that are useful for everyone.
- Bold Text: Makes text fonts thicker and easier to read, without increasing the font size.
- On/Off Labels: Ever wondered which side of a toggle is “on”? This has the standard “|” and “O” within a toggle switch to easily show the switch state.
- Increase Contrast: Similar to bold text, this makes things more legible by changing the colors of backgrounds and text, without making the text larger.
- Invert/Smart Invert: Especially for OLED screens, this will make light or white backgrounds dark or black.
- Color Filters: This one is close to my heart. It helps compensate for color blindness with different kinds of filters. Includes some cool images to help gauge which filter (and intensity) is correct.


Touch
Assistive Touch
This reminds me of one of the features of some of the custom Android ROMs that I used back in the day.
Enabling Assistive Touch puts a circle on your screen, that can be tapped to enable up to 6 actions to be run. These can be *almost anything*, from device actions (mute/volume control/notifications), to enabling Siri or Control Center, to even running Shortcuts. Additionally, you can enable an additional two actions with a double-tap or long-press of the button.
If you’re wanting quick, non-intrusive access to specific apps, actions, or Shortcuts, Assistive Touch is one of the best-hidden killer Accessibility features.


BackTap
Another cool, hidden option.
You can set up different actions to be performed when you double-tap or triple-tap the back of your phone. Like Assistive Touch, these can be phone controls (Control Center, App Switcher, Camera), accessibility controls (Zoom, Invert), or Shortcuts.
I have a triple-tap set up to open up my task manager to the “add a task” page. This way, when I need to add a new to-do item I can add it almost without thinking.
Additional Touch Controls
- Reachability: Pulling “down” on the bottom of the screen can bring the top of the screen down a bit lower. Good for one-handed use.
- Tap to Wake: If you’re accidentally turning on the screen with your phone in your pocket or bag, you may want to turn this feature off.
- Prevent Lock to End Call: Pressing the Lock button while on a call will hang up the call. If you want to disable this feature, here is where you do it.
Hearing
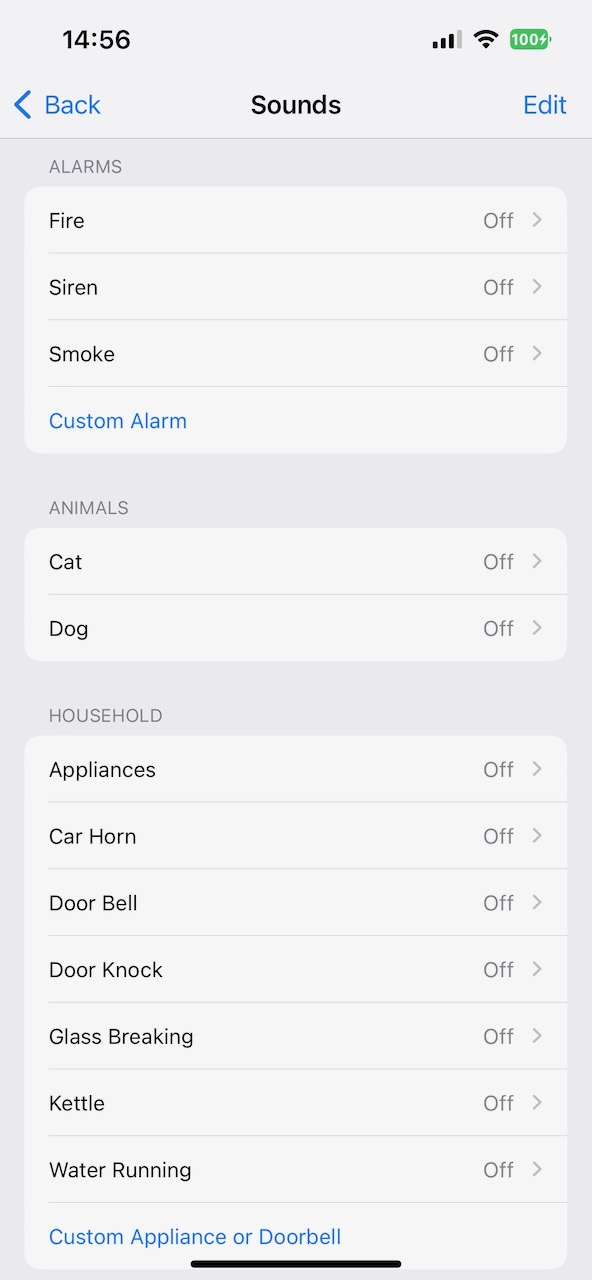
Sound Recognition
You can set up your phone to automatically listen and then notify you of specific sounds.
These can be alarms (Fire, Smoke, Sirens), pets (just cat or dog), home sounds (doorbell/knock, running water, appliances), or even people sounds (baby crying, coughing, shouting).
You can set different notification sounds for different recognized sounds. This can be useful if you’re listening for something (a package delivery requiring signing) or wearing headphones and want to be notified in case something specific happens nearby.
FYI, the iPhone does say that this feature should *not* be relied on in an emergency.
Background Sounds
Your iPhone has a built-in white noise machine in Accessibility -> Audio/Visual -> Background Sounds.
It is not as powerful as an app like Dark Noise, but if you just want to play some white noise or rain sounds, this is a *free* way to do that easily. You can set the volume of the sound, and set it to stop automatically when the phone is locked or when other media is playing.
Subtitles
There are two different caption options in Accessibility.
The “standard” option allows you to automatically enable captions on supported content, change the appearance of these captions, and show transcriptions of any announcements played by HomePods (if you have them).
The newer, beta option is called “Live Captions” and it attempts to caption *any* audio played through an app on your phone. The accuracy of these captions can vary, but this is a useful option for videos that may not have captions (like videos on Twitter or Facebook).
Misc
Guided Access
A *must-know* feature for parents!
Guided Access keeps your phone in a single app (until disabled). This is great if you need to give your child access to a single app on your phone, but don’t want them to play a game if you have to step away for a moment.
You can enable this feature with a triple-click of the side button, and disable it with a passcode or your FaceID.
Siri
There are quite a few options for refining Siri’s behavior in the Accessibility section.
You can make Siri wait longer for you to finish speaking, enable typing (instead of speaking) Siri commands, have Siri announce ALL notifications, set Siri to always listen (even when face-down), and more.
Bonus AirPods/Apple Watch
There are also accessibility options for AirPods and the Apple Watch.
AirPods
For AirPods, you can change the speed of the double/triple click as well as the duration required to count as a “hold”.
You can also refine the audio (and noise canceling) for AirPods by using a 3rd party app or the FaceID camera to create an audiogram (a frequency map of how your ears “hear”). I’ve used the Mimi Hearing Test app to determine my audiogram, and while the changes are subtle, it does seem to be doing something.
I don’t know how well the FaceID camera would do. While it can account for the external and internal shape of your ears, it can’t account for any hearing loss in the extreme upper and lower ranges of sound.
Apple Watch
Available in the Apple Watch app (under Accessibility).
Voiceover and Zoom function similarly to the iPhone options (although Zoom is likely more useful with the smaller Watch screen). You can also set the color to greyscale (no fancy color filter options), adjust the text size, and make all the text bold to increase legibility if desired.
The coolest accessibility feature for the Watch has to be AssistiveTouch. This allows control of the Watch (mostly) one-handed. You have four actions – pinch (with the thumb and forefinger of the hand wearing the watch), double pinch, clench, and double clench.
By default the clench registers as a “tap”, the double clench shows the action menu (for the hardware controls), and the pinch/double pinch move you forward and back within the interface. It takes a bit of getting used to, but if you need to stop an alarm or quickly check something and your hands are dirty, it’s a wonderful feature to have. It also allows (limited) use of the watch without looking (once you get used to the controls).
Leave a Reply
You must be logged in to post a comment.