
I’ve been on Google’s Project Fi for a couple of weeks, and I wanted to put together a few things that I’ve found that can help new users to get the most out of Project Fi.
If you don’t know about Google’s Project Fi cell phone service, I have a short introduction to Project Fi right here that should bring you up to speed. The main reason why I’m writing this post, though, is that since Project Fi charges you for the amount of data you use (1 cent per megabyte, according to Google) and will refund you for unused data, it’s in your best interest to conserve data whenever possible. While this may seem like a big hassle, often there are only a few settings or adjustments to make sure that you’re only using data for what’s important.
1. Check Your Streaming and Download Settings
This is probably the biggest one. If you’re a big user of audio and/or video streaming services, make sure that you check your settings to be on the lowest (acceptable) quality when you’re on mobile networks. Not every app will have adjustable settings, but most will. The ones that don’t have settings to lower mobile network quality will often have a setting to only allow streaming on Wi-Fi. If you’re worried about someone using your phone and running up your mobile network data bill, this would be a good setting to enable.
Some apps to look out for:
- Youtube
- Netflix
- Spotify
- Pandora
- Google Play Music
- Hulu
- Apple Music
- Google Play Store
2. (Pre)Download Favorite Content
If you have songs or an album (or few) you like (or, in my case, a small podcast addiction), make sure to try and download them when you’re on Wi-Fi and store them on your phone. Most music player apps will allow you to keep several albums, songs, or even playlists stored locally on your phone, and all of the podcast apps that I’ve used allow you to setup automatic downloads on Wi-Fi. Take a few minutes and set these up, since they can save lots of data (and therefore $$$) in a short amount of time.
In addition to downloading audio and video content, if you’re not using the Pocket app, you should be. This is a free app (which also has browser plugins for most major browsers) which allows you to save interesting articles and other content to your phone to read later. Pocket also has a feature to – you guessed it – download content only when on Wi-Fi networks. Instead of mindlessly browsing Facebook (and eating up data!) download some interesting articles or news stories and do some educational reading with no data use! I use this with Feedly RSS reader to quickly and easily look at new articles from a variety of sources and save the interesting ones to Pocket to read later.
As part of this step, it’s also worth noting that a 16GB phone is quite small nowadays – consider 32GB or larger, if possible.
3. Reign In Social Media Apps
Probably one of the biggest users of data is social media apps, especially Facebook. On Android, at least, the Facebook app is a pretty big mess (although it’s much better than it used to be). Consider using a “wrapper” app for Facebook – these basically use the mobile website with a few extra options for navigation and settings, and avoid things like background syncing, auto-playing videos, and annoying notifications that can be a pain to turn off. My personal favorite is Tinfoil for Facebook (which is free), but there are several. You could even ditch the apps altogether and just visit Facebook in Chrome (or any other browser), and avoid one more app in your app drawer.
Also check settings for your Google+, Twitter and Instagram apps. Both of these apps have settings to reduce the auto-sync frequency and/or image quality. Adjusting these settings down can help reduce the background data use when you’re not actively using the app.
4. Turn On Chrome’s Data Saver
If you use Android’s pre-installed Chrome browser, you can enable a “data saver” setting, which allows Chrome to load some compressed data from Google’s own servers, instead of downloading it all from the website(s) you are visiting. This doesn’t work for all pages (the exceptions are secure (https) pages and in incognito mode), but it can help.
To enable the data save feature, open up Chrome, tap on the three dot menu in the top right, tap on “Settings”, scroll down, and you’ll see the “Data Saver” at the very bottom.
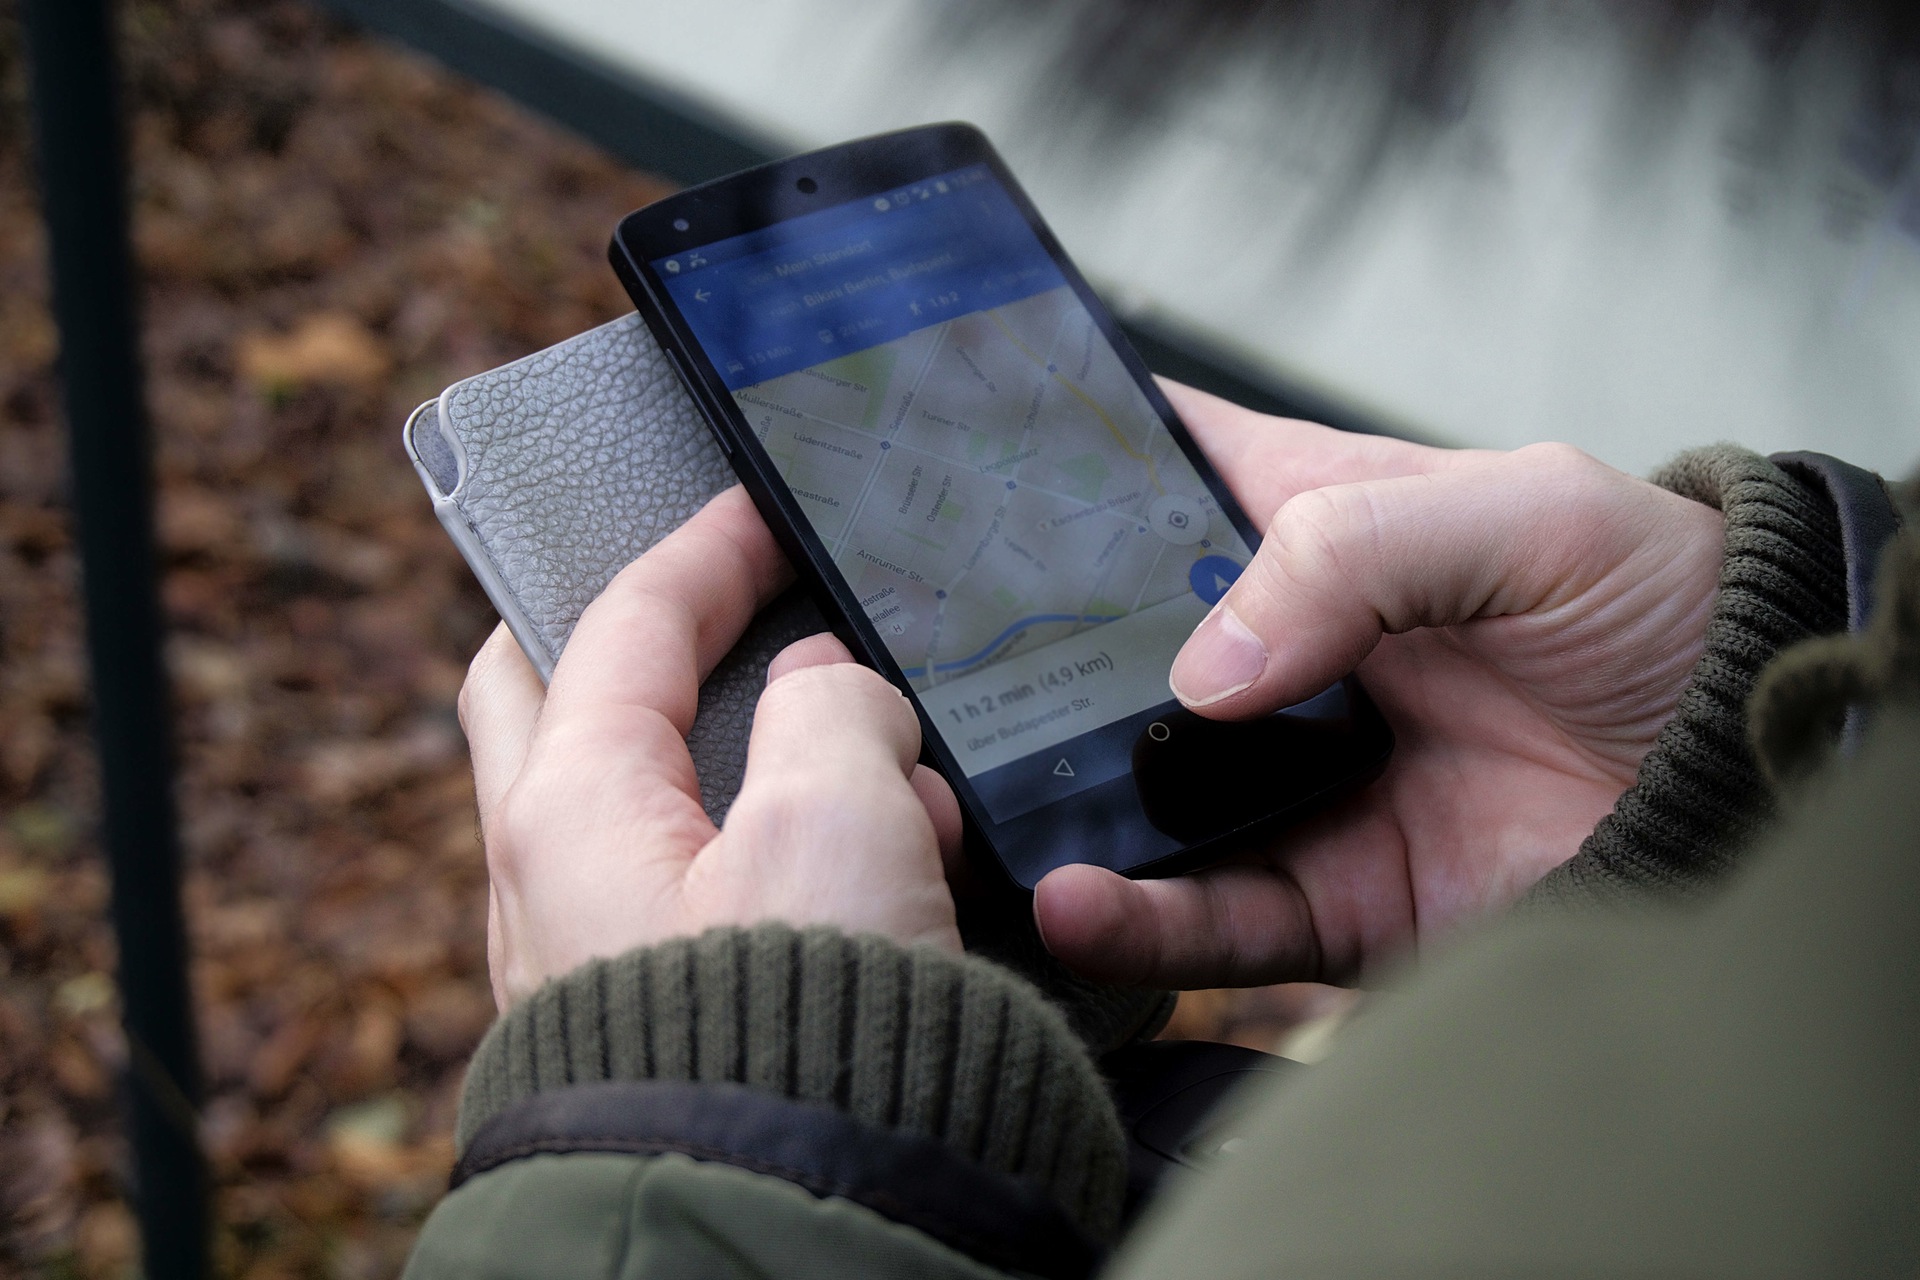
5. Download Google Map Data
If you use Google Maps for navigation and you’re often in the same city, you can pre-download a map area to save data while navigation. Google will still automatically download traffic data during the route planning and during your trip to navigate you around any congestion or accidents, but if you use navigation a lot, this can save you considerable data!
To download a map section, open up Maps and tap on the three-line “hamburger” menu in the top left, then tap “Offline Areas”, and then tap the floating action button (FAB) in the bottom right to select your area. Once you’ve selected the area, you can name it, and then go back to the “Offline areas” screen and tap the gear in the top right. Here you can set to automatically update and download offline areas (both recommended) and make sure that Maps will only do these downloads over Wi-Fi.
6. Be On The Lookout for Wi-Fi
It likely goes without saying, but make sure to keep your Wi-Fi on as much as possible, and be on the lookout for open networks. Part of the appeal of Project Fi is Google’s Wi-Fi Assistant that will automatically connect you to open networks that are reliable (and implement security with an automatic VPN), but Google can’t keep track of all of them, and it also can’t automatically connect to ones that require you to login or even click on the “I accept” button. Keeping an eye for for these kinds of open networks whenever you’re going to be in one place for a little bit can pay off in the long run, since Android does remember where Wi-Fi networks are, and can prompt you to reconnect when you return.
Keep in mind, however, that Project Fi’s Wi-Fi Assistant (which can be turned off and on through your Wi-Fi settings) appears to only use the automatic VPN function when it automatically connects. So if you’re not sure about the trustworthiness of a network, you’re better off not connecting.
A Few Final Thoughts
While these are some good guidelines, and many people can (hopefully) get some use out of them, they are only a starting point. After you join Project Fi, take some time once every week or so to look at your network data usage (pull down your notification shade twice, then tap the “Fi Network” icon, then click “More Settings”) so you can see what apps are using the most data. If it’s an app you don’t use (or hardly open), then make sure to go adjust that app’s settings (or just uninstall it). Remember, every megabyte is about 1 cent, and they add up!
Additionally, consider finding space on one of your home screens for the Project Fi widget. This shows you your current data usage, and it can help you catch rogue apps quickly and avoid going over your initial data usage. Don’t forget that using less data than your plan will result in Google crediting your account, so stay on top of it!
I hope this helps you get the most out of Project Fi – if you have any specific questions, please feel free to leave a comment below!
Leave a Reply
You must be logged in to post a comment.